Using Laravel Mix to build a Drupal theme
Laravel Mix allow to use relatively easily Webpack without having to worry to much about configuration, which can become quite complex. Here is a way to use it in your Drupal theme in order to build your assets from SASS and ES6 (if you want), automatically copy images and fonts, watch the file changes and synchronize your browser while developing.

New theme
Let’s define a new theme, for instance called d8t (as Drupal 8 theme) :
d8t.info.yml
name: D8t
type: theme
description: 'Custom Drupal 8 theme'
core: 8.x
base theme: classy
regions:
  header: Header # Drupal core, do not remove
  primary\_menu: Primary menu # Drupal core, do not remove
  secondary\_menu: Secondary menu # Drupal core, do not remove
  highlighted: Highlighted # Drupal core, do not remove
  help: Help # Drupal core, do not remove
  content: Content # Drupal core, do not remove
  sidebar\_first: Sidebar first # Drupal core, do not remove
  sidebar\_second: Sidebar second # Drupal core, do not remove
  footer: Footer # Drupal core, do not remove
  breadcrumb: Breadcrumb # Drupal core, do not remove
libraries:
  - d8t/global
Now, let’s define our global library that we just declared. In Laravel’s world, we would have written app instead of global, but in Drupal a theme can define various librairies. This library will have the 3 CSS files required by Drupal as well as a JavaScript file :
d8t.libraries.yml
global:
  version: VERSION
  css:
    base:
      public/css/global/base.css: {}
    layout:
      public/css/global/layout.css: {}
    component:
      public/css/global/components.css: {}
  js:
    public/js/global/global.js: {}
So far, nothing new. Let’s create the structure of images, SASS and JS source:
d8t/resources/images/exemple.jpg
d8t/resources/js/global/global.js
d8t/resources/sass/global/base.scss
d8t/resources/sass/global/components.scss
d8t/resources/sass/global/layout.scss
Laravel Mix
Now, let’s initialize a node modules package, add dependencies and scripts: Here is the final result:
package.json
{
  "name": "d8t",
  "version": "1.0.0",
  "main": "index.js",
  "author": "Guillaume Duveau",
  "license": "MIT",
  "devDependencies": {
    "@fortawesome/fontawesome-free": "^5.12.0",
    "browser-sync": "^2.26.7",
    "browser-sync-webpack-plugin": "^2.0.1",
    "cross-env": "^6.0.3",
    "laravel-mix": "^5.0.0",
    "materialize-css": "^1.0.0",
    "node-sass": "^4.13.0",
    "resolve-url-loader": "^3.1.0",
    "sass-loader": "^8.0.0",
    "vue-template-compiler": "^2.6.10"
  },
  "dependencies": {},
  "scripts": {
    "dev": "npm run development",
    "development": "cross-env NODE\_ENV=development node\_modules/webpack/bin/webpack.js --progress --hide-modules --config=node\_modules/laravel-mix/setup/webpack.config.js",
    "watch": "npm run development -- --watch",
    "hot": "cross-env NODE\_ENV=development node\_modules/webpack-dev-server/bin/webpack-dev-server.js --inline --hot --config=node\_modules/laravel-mix/setup/webpack.config.js",
    "prod": "npm run production",
    "production": "cross-env NODE\_ENV=production node\_modules/webpack/bin/webpack.js --no-progress --hide-modules --config=node\_modules/laravel-mix/setup/webpack.config.js"
  }
}
I also added Font Awesome and Materialize CSS, we will see later how to include them. They are of course facultative. All other modules are mandatory. For the scripts, we will mainly use watch when developing and production to generate the final production assets.
At last, let’s add this configuration file:
webpack.mix.js
const mix = require('laravel-mix')

mix
  .webpackConfig({
    module: {
      rules: \[
        {
          test: /\\.s\[ac\]ss$/i,
          use: \[
            {
              loader: 'sass-loader',
              options: {
                sassOptions: {
                  includePaths: \[
                    'node\_modules'
                  \]
                },
              },
            },
          \],
        },
      \],
    }
  })
  .setPublicPath('public')
  .setResourceRoot('../../')
  .js('resources/js/app/app.js', 'public/js/app')
  .sass('resources/sass/app/base.scss', 'public/css/app')
  .sass('resources/sass/app/layout.scss', 'public/css/app')
  .sass('resources/sass/app/components.scss', 'public/css/app')
  .sourceMaps(true, 'source-map')
  .browserSync({
    proxy: 'localhost:8080'
})- We ask sass-loader to include the node modules for the additional librairies that we use (Font Awesome and Materialize CSS), we will see later how to use them.
- setPublicPath(‘public’) tells Webpack the directory where the final built files must be written.
- setResourceRoot(’../../’) is a tip to use the on-fly URL replacement for images and fonts and their automatic copy.
- browserSync({ proxy: ‘localhost:8080’ }) must be adapted to your local development URL.
The configuration could be more complex but it’s enough for now.
External SASS / JavaScript librairies
At last here is how we can use the node modules librairies. For starters, let’s add Font Awesome:
components.scss
@import '~@fortawesome/fontawesome-free/css/all.css';- The ~ tells Webpack to search in the node_modules directory.
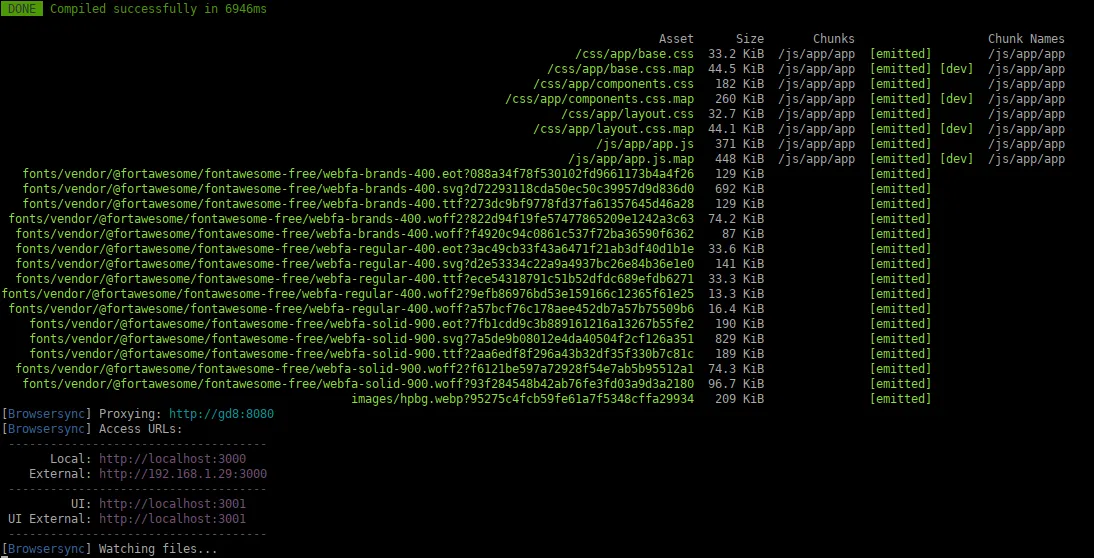
- Font Awesome fonts (.eot, .svg, .ttf, .woff, .woff2) are automatically copied in d8t/public/fonts/. If we add images for instance as backgrounds in the SASS, the images files will also be copied.
Now, let’s use Materialize CSS. We could just import everything:
components.scss
@import "~materialize-css/sass/materialize";Personally, in order to reduce the assets size and to be able to customize Materialize CSS’ variables, I prefer importing everything manually, using just what I need:
components.scss
/\*\*
 \* The order of imports must be respected.
 \*
 \* @see https://github.com/Dogfalo/materialize/blob/v1-dev/sass/materialize.scss
 \*/

// We need colors for variables, later.
@import "~materialize-css/sass/components/color-variables";
@import "~materialize-css/sass/components/color-classes";

// We want to override materialize-css variables.
@import "components/variables";

// This is necessary.
@import "~materialize-css/sass/components/normalize";
@import "~materialize-css/sass/components/global";

// Now we import only what we need.
@import "~materialize-css/sass/components/grid";
// We override this one.
@import "components/navbar";
@import "~materialize-css/sass/components/typography";
@import "~materialize-css/sass/components/buttons";
@import "~materialize-css/sass/components/forms/input-fields";
@import "~materialize-css/sass/components/sidenav";
@import "~materialize-css/sass/components/waves";- In components/_variables.scss I copied and modified the library’s _variables.scss.
At last, let’s write the JavaScript’s theme to have the parallax effect on the title block:
global.js
import { Parallax } from 'materialize-css'

Drupal.behaviors.gd8t = {

  attach: function (context, settings) {
    /\*\*
     \* Parallax.
     \*/
    const parallaxElems = document.querySelectorAll('.parallax')
    const parallaxInstances = M.Parallax.init(parallaxElems)
  }

}
Feels good to have modern JavaScript in a Drupal theme, right?
Next step for me: trying Webpack Encore. In the end it’s anyways the awesome Webpack but that helper is by Symfony, so it kind of makes sense to use it in Drupal too!